
Call me ecological, old fashioned or plain tight fisted but I still repair my punctures. Is it just me, as I don’t seem to know anyone else who does? Some other folk must, otherwise shops would not sell repair kits.
Of the few folk I know who have tried, most seem to claim they can’t get a reliable patch running high pressures around 100 psi.
Here are my steps for a good patch.
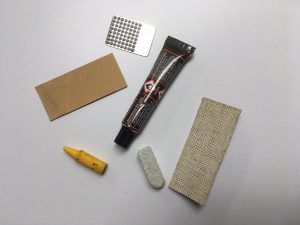
Repair Kit
- Thoroughly check the tyre for embedded flint/stone chips. If the tube will hold some air I find this it best done before removing the tube with some air in the tyre. On removing the tube also check inside the tyre for any projecting objects that would re-puncture the tube.
- Find the puncture, either by putting air in the tube and slowly rotating close to your ear/cheek. You will likely hear or feel the air from the puncture. If that does not work use a bowl of water. Make sure there is not more than one hole. Check back to the tyre at the puncture point and make sure the offending object is not still in the tyre.
- Clean the tube. Nothing excessive and if you need to use a bowl of water to find the puncture then drying the tyre will suffice. I use talc when I replace my tubes so that needs to be washed off the tube before patching.
- Ensure the tube is thoroughly dry and then scuff the area around the hole with the provided sandpaper of abrasive pad. This is key to getting a reliable patch.
- Apply adhesive in an area larger than the patch to be applied. Just needs to be a thin layer evenly spread.
- Allow adhesive to dry till it is on the dry side of tacky.
- Apply patch and press firmly.
- Remove film from patch. Fold the tyre across the patch and the film should split. This allows the film to be removed from the centre and avoids pulling up the edge of the patch.
- Apply talc around the excessive adhesive. I still have the little John Bull French Chalk puffer I used as a kid.

Vintage French Chalk Puffer
- Preferably allow to dry thoroughly before refitting.
- I like to put some talc in the tyre and rotate the wheel to coat the inside of the tyre prior to replacing a tube. This helps prevent the tube sticking to the inside of the tyre.

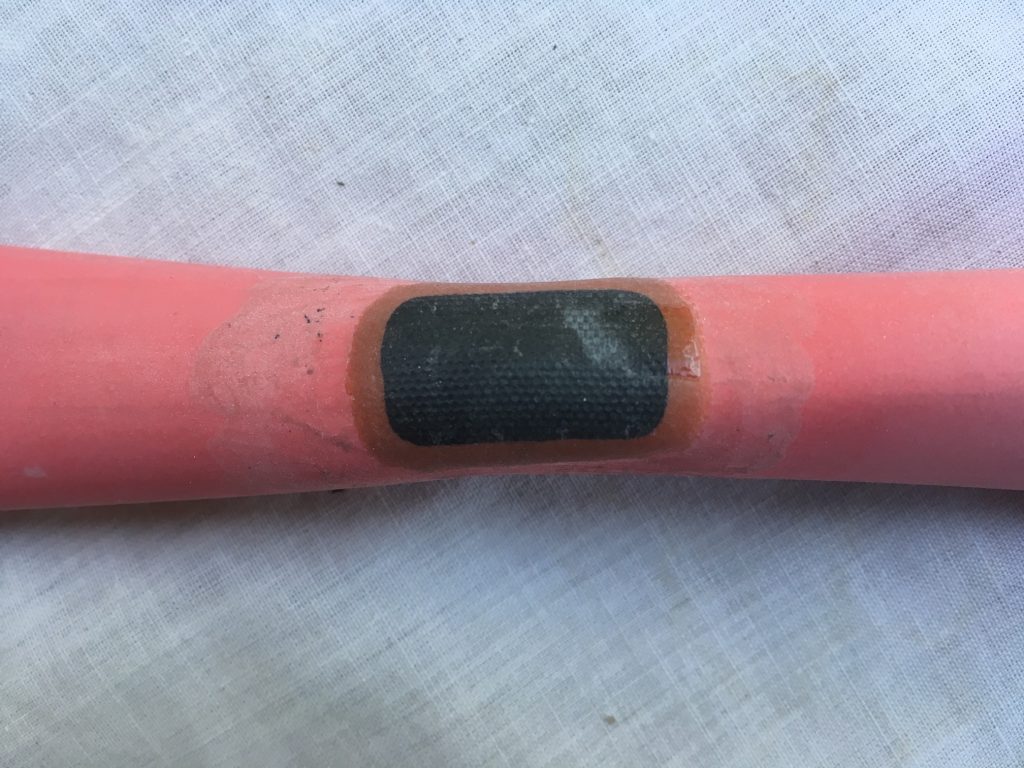
Incidentally, I have heard folk say you can’t repair latex tubes. I run latex on #1 and have had no issues successfully repairing them, see lead photo, that patch has done many miles. Note – if you run Tubs and send them for repair these will be Latex (if of a decent make) and so will be patched by the repairer.
I usually draw the limit at 6 repairs in a tube before ditching. In this day and age of manufactured waste and redundancy it does irk me when I can’t repair something. It might take a while but surely, sometimes, that’s the whole point of doing something properly.
As for ‘cyclists’ who abandon their punctured tubes by the roadside I just wonder what planet they are from.
This is what my dad did to my tubes back in the 70’s!
https://www.youtube.com/watch?v=ennV0BVFZVw
So is that a normal patch on the latex tube? I thought you had to repair them with latex and the few times I’ve tried have been unsuccessful.
With you on butyl tubes although now I’m running tubeless again. We’ll see how that goes…
As for having a French Chalk Puffer, I’m pretty sure that’s a euphemism for something you don’t want to Google.
Yes it’s a standard patch. I was once told it would not work too but I tried it some years ago and it was fine so I’ve been using them for years on latex tubes.
You can’t beat a French Puffer……
A Trench Puffer? Thomas Voeckler peut-etre?
I save a clapped out latex tube to cut into patches. Using a rubber glue on each surface, tack dried, then stick them together under a C-clamp, then use baby powder over the repaired patch area shove back into wheel, or roll up, put in zip bag with silica gel and store in dark dry place.